среда, 30 октября 2013 г.

Santa Clause cards...

Hi! I decided get right into the swing of making Christmas cards. I promised myself I'll start earlier this year and make a lot more than last year. Today, I have three identical cards with a Santa Clause. I thought, these would be cute for Liana to give to her friends.


I made three to save time. After you figure out the design of your first card, the other two get done in no time! 


I am addicted to using white glitter on my cards! It transforms anything plane and ordinary into something special! Here, I covered trees and part of Santa's outfit with it. It's pretty easy to do too: color it with glue pen and sprinkle glitter on top!


I have printed these Santa Clauses on white cardstock and  took them and a pair of scissors with me to a car appointment. Worked out great - by cutting these out there, I killed time waiting for my car to be re-inspected and saved time at home when I needed to use them!

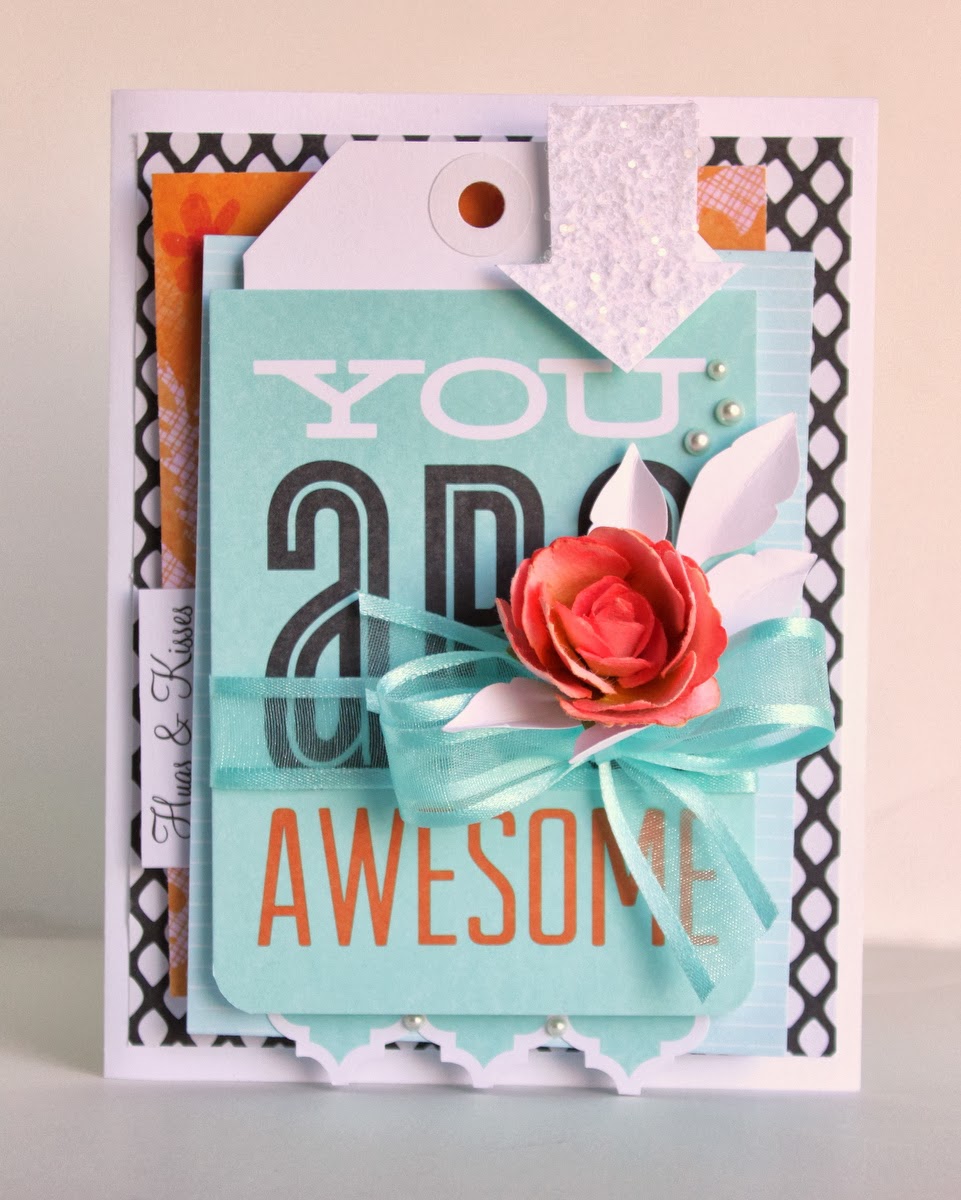
I've mentioned before that I always back my cards. They feel so much sturdier this way.


And it looks prettier too :)

In case you were interested in this cute Santa, I found it online HERE. You can click on the image below to save it or visit the link. I printed mine in wallet size - resolution was just enough to print a crisp image.

 Thank you for stopping by today and I hope you have a wonderful day!

Until next time!

вторник, 29 октября 2013 г.

Thoughts on December Daily...

The end of October means it's time to put your December Daily album together.

I've made a DD with Ali Edwards and many others for four years in a row. I loved the idea of documenting day to day life and stories. I LOVED getting supplies together to create a new book that will hold all of these stories. I loved taking pictures and thinking which one of today's moments I want to include in my book to remember for years to come... but...

 
I've been thinking a lot about December Daily lately and I had to make a decision not to make one this year. There are a number of reasons for that, but one main reason that overweight the excitement to join others on yet another fun DD journey was that my scrapbook albums are totally missing Christmas stories.

 
We love to scrapbook summer. I have a little bit of fall and spring related scrapbook pages, but not a single Christmas layout. When I thought about it, it felt a little sad. It seemed like we don't even celebrate Christmas at all. I know why that happens for me. We start Christmas season early... It starts with the stores displaying Holiday merchandise a lot earlier than we are ready to see it. These pictures were taken 2 weeks ago:


Flip flops and snowmen kinda don't go together on the same picture...


December is a pretty busy month around here. When December comes and you finally feel like it's holiday season, that's when you want to scrapbook Christmas! But for four years I concentrated on December daily. We can only do so much. After December was over, I wasn't even done with DD, because towards the end of the month it's usually getting a lot busier. Honestly, sometimes, I didn't even feel like finishing my DD in January, not even talking about making a page.

This year, I want to concentrate on scrapbooking our favorite Christmas and Holiday moments and adding them to our albums! Old memories and new. Funny and precious. Our traditions and people we celebrate our holidays with. I'll still try to take some pictures everyday, but that will be added into my Project Life album.

Also, I didn't make enough Christmas cards last year, so I'm starting early this year and will try to expand my collection throughout the season, so I have a choice when I'll need a card. Here's one I just created last week:


I used some beautiful papers by Les Papiers de Pandore for it.


It does feel a little sad saying NO to DD, but I feel that this is the right decision for me this year. I'm looking forward to making a lot of Christmas cards and creating winter and Christmas layouts!

Any thoughts on this subject? I'd like to hear!

Thank you for stopping by today! I have two more pages to share that I created recently. Both of them are waiting for journaling, so I hope to see you tomorrow!

Have a great day! Enjoy the weather!

понедельник, 28 октября 2013 г.

What's for dinner?

Девочки привет! Снова перегруженная неделя и снова не было времени на блог, но у меня появилось пару вещей которыми хотелось поделиться с вами. Для начала - любимое фото недели! Наша молодёжь ездила в Балтимор, где Алёна сфотографировала вечерний город:


Вообще, на этой неделе, я настроена ставить новый пост каждый день! Начнём со съедобного, потому что для этого у меня фото готовы. На прошлой неделе мы с детками готовили китайские вареники "Potstickers" которыми я хотела с вами поделиться. Они очень легко готовятся!


Для начинки вам потребуется фарш (я часть свинного заменила домашним фаршем из куринной крудинки), морковь, Napa капуста, лук, яйцо, соль, перец, зубочек чеснока, ложка соевого соуса и ложка Sesame oil (которого у меня не было).


Всё хорошенько перемешать и  поставить на час в холодильник мариноваться. 


Закручивали мы наши "вареники"в готовые липестки которые можно купить практически в любом магазине, и обычно они находятся в овощном отделе. На пакете написано "Won ton wrappers". Они продаются квадратными, но вареники удобнее клеить из круглого теста, поэтому мы нашим лепёшкам слегка изменили форму срезав ножом вокруг стаканчика.


 Это делается очень просто и быстро, и можно срезать сразу по 4-5 штук.


К сожалению у меня нету фото где я их слепливала, но здесь особой фантазии не надо. На серединку кладётся начинка, края обмазываются яйцом и склеиваюся слегка добавляя складочки на "лицевой" стороне вареника.


Слепленные вареники обжариваюся с трёх сторон на растительном масле.


Когда они подрумянятся, залить кипятком и оставить их тушить под крышкой минут 5. Открыть крышку и дотушить ещё минуты две, пока испарится вода. Ваше китайское искусство готово!


Подают вареники с соевым соусом, но мы их ели и со сметаной, и с аджикой, и с Duck sauce. Так как у нас начинки получилось очень много, у нас ушло две пачки лепёшек по 50 штук. Мы сначала наелись, а потом я попробовала из них суп сварить и должна сказать, что тоже очень неплохо получается! Всем приятного аппетита!

Спасибо всем кто зашёл! Хорошего вам дня и прекрасного настроения!

До завтра!
 

среда, 23 октября 2013 г.

Scrapbooking on a Budget - Scraplift!

 Hello everyone! Don't you love how scrapbooking hobby gives you so many different outlets to express yourself. Some days you feel like blogging, other days you just wanna stay at your table and create, create, create. That's where I've been missing :) It happens each time I clean my table. I mean when I reeeally clean and reorganize it.


Today I wanted to share another "Scrapbooking on a Budget" secret and two more pages! It may not seem related to Budget at first but I have my reason's behind it :)

Secret #11: Scraplift to save time and money.

There are at least three reasons why scraplifting helps you stay on the budget.
  1. First of all, scraplifting saves time, weather you make a very close lift or use a partial idea like photo placement, design, or color combination. 
  2. It's pretty easy to guess pieces of papers you will use by checking project you are scraplifting, so you don't waste your favorite product by cutting a bigger piece and then cutting away smaller pieces that will not be good for anything else.
  3. Scraplifting is a great exercise for beginners especially. You can save money on classes, since some classes teach by making you copy a project anyway. There are ton's of great classes and workshops that teach you more amazing thing's and techniques, but you can start learning by scralifting.
I have two examples for you today. First one is a very close scraplift of a layout by Jennifer Gallacher.  Jennifer is one of my most scraplifted scrapbookers. When I saw THIS page, I knew I will be scraplifting it! I just wanted my album to have one like that too. I started making this by choosing products that were as similar as possible to the ones she used.


 I did just a few minor changes along the way like including my journaling in a different spot and to shrinking her 12x12 page into a smaller 8.5x11 size. But the outcome is pretty similar.

 
After making this page, I learned that I love using arrows on the page and I started including them a lot more often now.

My second page was inspired by Nichole Magouirk. I love the way she used butterflies on THIS page, and I love her color combination here. Again, I did my page on a smaller format. Used two photos instead of one. Used papers and products I had on hand, not trying to match any of hers. But I had a visual example that took all of the guessing work out of the game. This layout came out pretty quickly.


The story is about Liana's uncle that always needed a kiss from her...


All of the butterflies were cut with Cameo, which made all the detailed work of the page - a piece of cake. All I had to do is change the size and pattern paper. I used a stamp by Les Papiers de Pandore and a few printables by Heidy Swapp.

And of course I have to mention, that scraplifting is allowed and even incouraged as long as we mention the name of the artist who made the original project. I can tell from my own experience, it was so nice to receive an email from a lady across the country telling me that she scraplifted one o my pages. She also left a link, so I could go check her scraplifted page out. Feels great knowing, that someone was inspired by your work!

If you are interested, here's the list of previous posts on this subject:
Scrapbooking on a Budget - secret 10: 12x12 vs 8.5x11
Scrapbooking on a Budget - secrets 6-9: Make your own.
Scrapbooking on a Budget - secrets 4&5: Printables
Scrapbooking on a Budget - secrets 1,2,3.

Thank you everyone for stopping by! I hope you have a wonderful day and I'll see you next time!

Happy scraplifting!

четверг, 17 октября 2013 г.

Fall card...

It's hard to believe, but we are in second half of October already... Time just flies! We are only two month way from Christmas... More about that later, but today we continue to experience the blessing of a beautiful and warm Autumn!

I love all the rich colors the fall offers and for the longest time wanted to work with them on a page or a card! I made one in my traditional "pile up" design. I had an outline shape of a leaf in Silhouette studio, but I worked on it to add all the lines inside to make it more detailed!


I love this golden brown ribbon! It just adds a tiny bit of shimmer to the card. I bet roses made out of this ribbon would look very pretty. Maybe I should try that!

Thank you for stopping by, and I hope to see you soon!

Have a great day!

среда, 16 октября 2013 г.

New collections by Les Papiers de Pandore!


Hello girls! Les Papiers de Pandore released their new Fall/Winter 2013 collections! I was SO excited to see these in person! They look awesome! The first one is called Crochetin', and this collection is dedicated to pampering and anything handmade or "do it yourself"; and has beautiful shades of yellow, cream, grey and a touch of purple!

Crocheting:

Nouvelles collections et blog candy...

Here is the page Julie made using the first collection.  She is such an amazing artist! I love everything she makes!

Nouvelles collections et blog candy...

It reminded me of so many precious memories from my childhood. Hopefully, I can record some of them using this goodness!

The second collection is called Winter Memories, and it's a winter theme collection. Papers in this collection have soft watercolor effect. It's a beautiful combination of teal, pink and cranberry colors.


Winter Memories:

Nouvelles collections et blog candy...
 And another awesome layout created by Julie:

Nouvelles collections et blog candy...

The best part is that you can win these collection! Please visit les Papiers de Pandore blog HERE and leave a comment to be entered in the drawing! You can do that any time by October 31.

I got a chance to play with this goodness this week and it was hard to stop! I made three pages and two cards that I will share soon!

Thanks for stopping by and I'll catch you next time!

вторник, 15 октября 2013 г.

Smells like fall...

Девочки привет! И как не крутите, а всё таки каждый сезон диктует свои рецепты. У нас погода наконец осенью пахнет. Когда всю ночь льёт серый дождь...


тогда на утро ваш backyard становится похож с видом на море...


Когда, как не осенью, хочется чего то тёпленького, варенного, домашнего как например кабаковой каши. Понимаю, что далеко не каждый любит кашу молочную, а тем более кабаковую, но мои детки уплетают её с удовольствием. Особенно Лианочка. Она всё старалась правильно произнести название, а потом говорит: "Давай я просто буду говорить оранжевая каша".

Так вот, пока моя оранжевая каша варилась я щёлкнула пару фото...


Кубики кабака я сначала немного потушила на масле, потом добавила рис, залила водой и добавила стакан сливок, немного соли и чуточку сахара. Кашу специально не делала слишком сладкой, потому что хотела подавать её со взбитыми сливками и поливать домашней карамелью. Сверху для полного счастья посыпала орехами. Я вообще её с кофе вместо дисерта ела.

Дождь у нас прошёл и лето продолжается. Люблю когда дети на прогулку ходят с фотоаппаратом! Они возвращаются и показывают свои шедевры. Вот например, интересное фото Алёна сделала:


У меня есть ещё одна открыточка которую здесь ещё не показывала. Начала с оранжевого и планировала делать её осеннюю, а потом как то на неё взкарабкалась эта карточка со словами: You are awesome!  и вот что у меня получилось...


(Я всё это быстренько ещё утречком написала, только не успела нажать на кнопку Publish, как у нас потерялась интернет связь... и только вот недавно появилась.)

Спасибо что заглянули в гости!

До скорой встречи!

понедельник, 14 октября 2013 г.

"Faking a nap" - new layout!

Доброе утро девочки! Я сделала новую страничку! У меня обычно после долгого перерыва всегда получается очень простенькая, как бы тренировочная страничка. Но главной целью было здесь, оставить документацию определённого периода нашей жизни, поэтому простой дизайн сюда даже очень кстати.


Где то я оставила страницу и она у меня приобрела волны от влажности :( До сих пор не знаю где и когда это произошло. Мне конечно это очень не нравится, но переделывать не буду. По крайней мере урок можно взять, что всяческие мокрые краски в скрапбукинге не для меня...

Для тех кто интересуется историей, фото поближе... 

Я напечатала journaling на одном из тегов. Пришлось сделать пару попыток пока всё точно поместилось в его диаметр. В принципе, на третий раз я уже пропускала чистовик. 

Мне очень нравится использовать нейтральные оттенки с добавлением одного цвета. Для страничи использовала розовый плюс серый, а для открытки - розовый плюс коричневый. Почему то мне легче работать с monochromatic color schemes.


и чуть поближе...


Для эксперимента использовала фотографии розочек. Я их немного подкорректировала в фотошопе и распечатала на белой бумаге в разных размерах.

Пойду я выручать своего младшего родственника, а то он что то не очень хорошо пахнет...

Научили это чудо целоваться и теперь когда зовёшь его сфотографировать, он думает что снова целовать хотят, и вот такую уточку строит. Фото сделала Сузанка.

Спасибо всем кто заглядывает! Всегда рада вашим отзывам! Всем хорошего дня и отличного настроения!

Надеюсь вернуться завтра. До встречи!

вторник, 8 октября 2013 г.

Birthday explosion box...

Hello! I'm back, as promised, with another project. I made this one for my friend's birthday. It all started with these green flowers that I wanted to use on top of the box, so I guess that's where the green palette for this project came from...


I really wanted to incorporate another color into it, like purple or pink, but for some reason it just didn't work. Later I added just a little bit of blue inside the box.


These white silhouette leaves were cut with my Silhouette (of course). I love how delicate they look on any project! This is probably one of my very favorite shapes I ever downloaded.

If you noticed, I love adding black and grey to my projects lately. It makes other colors pop and gives the project a little modern feel, I guess (добавляет строгость).


Of course, this box would not be complete without some chocolate...


I kept inside of the box pretty simple. All four sides are decorated with the same Silhouette cut that was popped up with some dimensional foam adhesive and a pearl.


To personalize it, I used glittered alphabet stickers for her name... And added some more half pearls...


Похоже, что подруге угодила:) Очень приятно видеть такую положительную реакцию :)) Хорошо что подружка заехала на кофе и могла эту коробочку забрать лично, но теперь нужно придумать удобный способ пересылания их по почте, если вдруг придется...

Thank you for stopping by today! Hope you have a great day and I'll see you soon!

Until next time!