четверг, 29 ноября 2012 г.

December Daily 2012

Hello! December is going to be here in two days and I just now finished the base of my December Daily album. Again, looking back, realizing what has worked and what hasn't I decided to simplify the process even more. My goal is to have it simple, but done, not fancy and still have it laying around not finished way passed February...


Let's start with the cover. I usually make a few, pick one and give the others away, but I didn't have time to make more then one this year. White... yes, I'm dreaming of a White Christmas, so I made my cover in white. (I would probably have to take it off for the month when I'll be working with it to keep it clean)


For the main part, I'm giving it a try this year and making pages out of envelopes. I wanted to go with plain white envelopes that come in the box with Christmas Cards, but then decided to cut them out myself for more stable pages. I downloaded a shape from the Silhouette store and resized the envelope to fit on 12x12 cardstock. For some of them I added a decorative element like this adorable Christmas Tree:


Folded envelope came out to be 8x5. It's just a tiny bit smaller then my previous DD albums, which were (8.5x5.5) I folded envelopes and punched holes in them. Now, one side of it will be used as a regular page in the album where the other one will hold journaling. THAT's where the main difference is this year. I want to include journaling from everyone, not just myself and I want to write it down whenever the thought comes, not when I have to make a page for that day. I have BIG HOPES that this way I will be able to stay on track and have it finished by the end of the month!


Here are a few more samples of what I have inside:


 I used my Silhouette to cut that page out. There was a similar one online for downloading, but it was square, so I arranged it to fit the size of my album.


Red envelope cut from red paper - this one was a little thinner which is nice because I have a feeling my DD is going to be pretty fat this year. I did include just a few plain pages - non envelopes, that's what the other pretty paper is. Which is by Teresa Collins by the way.


By the way, Silhouette users there's a great sale at the Silhouette store this week! All shapes are HALF the price! You can tell, I was shopping. But I also made a few tags and other things myself.


Folded green envelope, transparency, white envelope...


 I also cut a few smaller envelopes for the pages that is not an envelope. Again, nothing glued. Plain and simple. I might add a few more things along the way, but wanted to have a pretty light base for the album, because that's what works for me.

 It is my fourth year participating in December Daily challenge. It was nice to see all of them together. I plan leaving them out for the month...


There was one more December Daily album that I did, but it was sent to my mother-in-law, so it's not in the picture. 


I debated a lot between styles this year, but decided to stay with the tradition of three ring handmade book. This leather mini album was one of the options, but again, I was afraid, it may get into the pile of "I'll-finish-it-later" projects.


One last thing I did is emptied my DD plastic box and refilled it with the new stuff. That's another idea that works for me. I have to have everything together, or I might spend too much time getting everything out and putting it back.


Hope your DD is waiting to be filled with pictures and stories too! NOW I'm excited for December to come. Speaking of December, I really hope it brings some snow. The more the merrier!

Thanks for stopping by and have the nicest day ever!

вторник, 27 ноября 2012 г.

Christmas cards


I have a few Christmas cards to share with you today, and this weather just helped me to get into the right mood for Christmas related projects:


Love having my table by the window! Enjoying a little winter wonderland view:)

I was really hopping to get a lot of Christmas cards done ahead of time this year, but neah... it didn't happen. Yesterday and today though, I spent some time playing with paper and making a lot of cards. Sharing two that are done and have at least four more on the table.


I used dimentional adhesive to pop that window frame off the card:


And one more in traditional red color:


I have been using my Silhouette Cameo nonstop these two days. Learning some new things, downloading new designs, cutting shapes out. Love it! 

Will be back soon to share more!

Have a grate day everyone!

суббота, 24 ноября 2012 г.

Rejoice...

Busy holiday weekend didn't let me create a whole lot in in my creative corner, even though I did update my Project Life. Today I decided to quickly share a picture of a cake we created for Thanksgiving with my children.


It was a five layer cake with cream cheese frosting, Nutella topping and layers of other flavors like lemon, pineapples and raspberries decorated with nuts and pomegranate seeds. It was one of many desserts on Thanksgiving Day.

And one more thing before I go. Today I came across this image on Pinterest, and it was a good reminder for me to rejoice and be glad.  Not just on Thanksgiving Day, but any given day!


Hope to be back soon with something "pretty paper" related.

See you!

четверг, 22 ноября 2012 г.

Happy Thanksgiving!

Happy Thanksgiving everyone! There's so many things to be thankful for! I'm not going to list them all, because it's gonna take a day to do so. Today was a beautiful day - warm and sunny and I'm thankful for that...
Today we are getting ready to go celebrate Thanksgiving at my sister's house. Today was spent together with kids doing some cooking, cleaning, decorating cake, listening to Christmas music...

It wasn't all perfect, but it was precious and I'm so thankful for today! Leaving in a few minutesto go to the airport to meet my parents and my sister with her family. Going to have Thanksgiving dinner together. I love holidays!

Hope you enjoy your Thanksgiving!

See you later!

понедельник, 19 ноября 2012 г.

Les papiers de Pandore

Hello! I have finally had an opportunity to work with the new release of papers by Les papiers de Pandore. These papers are so beautiful and they coordinate very well together, but they are also very versatile! Different combinations of them were speaking so many different themes to me.
There's also a cut out page in the kit and my first layout was inspired by the cute circle embellishments. I especially liked the one with a camera, and it reminded me of an occasion where the most pictures are taken - a wedding. The paper with film strips was just a perfect addition to go with a theme. 


I absolutely love all the greys in the kit! It's by favorite neutral color to go to.


I used only three colors from the kit to make my pages different from each other and to stay true to my style.

A few die cut pieces, pearls and pop dots completed the page. The title was also cut out with Silhouette using the same red paper form the kit. I love how the design of a background paper kind of shines on the pictures.


 Thank you sister for letting me use your pictures for this layout! I also made a card with the same color combination my layout was made with.


I used some dimensional adhesives to separate layers on the card.

Thank you for stopping by and I'll see you soon! Have a great day!

четверг, 15 ноября 2012 г.

Обещанная страничка

Привет всем! Быстренько хочу поделиться последней страничкой и нужно идти готовить любимому ужин. Что то себе придумала, но не знаю как получится. В любом случае ему должно понравится потому что в рецепте есть грибы... Если получится красиво, обязательно покажу :)

Использовала один из ходовых и любимых дизайнов - фото в строчку. Здесь поставила 5 тонких фотографий. Четыре из них срезаны на 5.5х2.5 инчей. 


Мне нравится как красный цвет смотрится на фоне серых. Решила не домешивать сюда другие цвета и оставить её такой строгой.

На фото прикрепила кусочек упаковки из штампа который получила из Франции от Les papiers de Pandore.

 Title к страничке вырезан с помощью Silhouette. Буква ф не помещалась на бумагу под дерево, решила подложить punched out circle, и обвела его вторым кругом слегка смещённым из точек оставшихся от набора с которым работала до этого (это точки от тех чёрных рамок использованных на страничке "Honey")

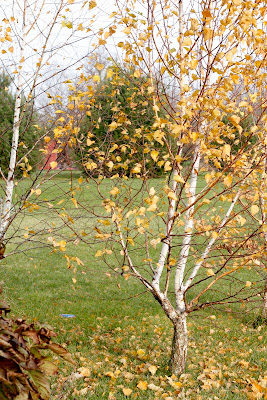
Думала что теплая погода закончилась, но хотя сейчас и не совсем тепло, все же приятно и красиво. Особенно когда солнышко светит на пожелтевшие листочки наших берёз под окном. Нравится что стол теперь стоит возле окна и я могу любоваться таким видом:


Спасибо что зашли, а я постараюсь не задерживаться со следующим чем то...Is anyone planning to do their December Daily this year? I'm thinking about gathering supplies for this season.

Всем хорошего дня и прекрасного настроения! До встречи!

вторник, 13 ноября 2012 г.

Quick post

Still hard to believe, but it seems like Christmas season is in full bloom! Last week we were at the mall and some stores had Christmas music on already. It also seems like yesterday was the last warm day of the year... 

After that visit to the mall, I got in the mood to create something wintery... that's where this very simple card was born:


Today, I was working on a new page, which I plan to finish and share with you tomorrow. Loved to work with a different color scheme for a chance. While writing this post I got a surprise at my door:


- a package with papers from Les papiers de Pandore! So excited to create something with the given product! That's it for today, but I hope to be back very soon!

Thanks for stopping by!


пятница, 9 ноября 2012 г.

One kit = Fourteen projects!

Hello! First of all I wanted to share an exciting news - I was honored to be a guest blogger at Two Peas in a Bucket on November 8th, which was yesterday! They featured my summer mini album, I shared here earlier. You can check the post over at Two Peas HERE:


And now I decided to make a summery of my kit adventure. You've probably seen all of these projects already throughout the last few weeks, but I wanted to gather them up all together.

I was inspired by a video Shimelle Laine did on NSD, where she made a kit and then created as many projects as she could. You can watch that video HERE. And there's another video by her where she explains how she puts her own kits together, which can be watched HERE. My adventure started with my own homemade kit. It was based a little on one of the kits from Studio Calico.

Studio Calico at left. What I had to work with is on the right picture. I decided to go one step further and calculate the price of my kit. Here we go: 11 sheets of pattern paper by Studio Calico, Echo Park, MME, American Crafts and Pebbles; 1 alphabet sticker sheet by Basic Grey, yellow tiny stickers by LYB, one embellishment sheet by Echo Park, five 6x6 pieces of paper by Echo Park, MME; one package of white peals, labels by Martha Steward and 5 pieces of colored cardstock - all came up to a little under $15. I also used unlimited amount of white cardstock. But white cardstock in scrapbooking for me is like water in cooking recipes for others - which I don't count :)

HERE IS WHAT CAME OUT OF IT:


I tried to vary supplies between projects as much as possible trying hard not to make them look all the same. I used some printable cards and a stamp I already owned. Besides that, everything else came from that tiny pile.

The result is - I was able to make 14 projects for just under 15 dollars! I was trying to make a point here and now I can FINALLY say it - SCRAPBOOKING DOESN'T HAVE TO BE EXPENSIVE!

If you are new to scrapbooking, and don't want to get into it because of expense of the hobby, think again! You can gather a supplies to make a kit and then work with it. You don't have to use it to the last drop, like I did, but it is so fun and less time spent on pulling out supplies for each project when you work with a kit.

One last picture :) Ready for a new adventure now... there are so many of them I don't know which one to choose - catching up on PL, sewing something, learning more about Silhouette, making a photo book to give to grandparents for Christmas, trying a new recipe, making Christmas cards, doing Home Decor project, assembling December Daily. That is one exciting list!

Thanks for coming over! Have a great day!
 

среда, 7 ноября 2012 г.

Leftovers from the kit

Good morning! Last time I told you that I was ready to play with other paper in my stash, but taking a closer look at the leftovers from the kit, I decided to give it a try and make one more page.

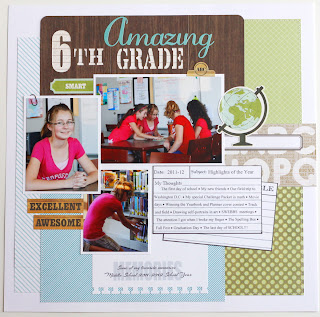
My motivation for this page was that adorable globe sticker. That helped me make a decision to do a school themed layout. By this time all of my papers were cut into various small pieces. To make a "blackboard" I had to piece together three pieces of paper. Others were laid to make the background. Here is how the page turned out to be:


Thats it! Done with the kit! That's what I thought... but then the yellow bee hives paper looked at me and I decided to give one last shout. One more layout. This one literally was pieced from tiny pieces of paper. I made it an 8.5x11 size, thinking it will be a smaller area to cover.

I must say that the whole bee world is amazing! I don't know near as much as Tim (my brother in law) does, but consider myself lucky to be his relative, since now we always have honey at home! The 100% real kind of honey!


The work that he puts into this "hobby" is priceless! I witnessed only a little bit and I know for sure now that honey does not come from a jar!

So, that's it for pages from the kit, but I was still able to make two cards yet. Nothing extra special, but sometimes we need those simple cards. Even to write a note to a child or a teacher.


That's it! Now I'm officially done with the kit! So excited to make something new. I mean make something using new stuff. But I should say, I really enjoyed this experience! I might do this sometimes again.

I will leave you with a piece of banana bread that my kids made last week. No school for my kids means - baking time. It's doesn't necessarily benefits our shapes but how can I resist, when they enjoy baking so much...


Their cousins gave us the recipe, but we altered it by addeding raisin's and peanut butter to it. Good job girls!

Thanks for visiting! I'll be back soon!